Culinary Rhapsodies: Okonomiyaki
15 Dec 2012
The other day, my husband and I were watching The Next Iron Chef: Redemption. One of the chefs made an okonomiyaki. I’m glad he was able to make the product successfully in the end because it’s one of the simpler Japanese dishes to make. It uses simple ingredients (aside from the toppings) and can be made quickly and is super yummy. Just like breakfast is served differently all across the US, these savory pancakes can differ from one region to another. Some add seafood (shrimp, octopus, squid, cod roe), yamaimo (a type of yam you grate raw and has an amazing slimy consistency), cheese, natto (fermented soybeans), kimchi (a Korean dish, usually fermented veggies of sorts) etc. Some people add yakisoba to it (which I made yesterday for lunch and forgot to take photos! shakes fist in air So you’ll just have to wait in expectation for that post until I make it again. That’s super easy too. You can cook it in 10 minutes.)
I know this post is slightly long-winded, but bear with me. This (the explanations) is why it’s so hard to post and blog Japanese recipes. I’ve had so many people encourage me to post Japanese recipes but it’s so hard to blog it! It’s so much easier to show you. Things are taught to us in the kitchen by cooking with grandma or mom and it’s not always measured. It’s always “about this much” or “about that much” and you learn to cook instinctively rather than by measurement. You learn by doing it while the older female says “not enough” or “that seems fine” or “that’s too much, what are you thinking”. So much for our math skills! Food Network, if you’re interested in producing a Japanese cooking show, I’ll do it. Blogging this is hard.
Anyway, onto description of toppings. There are some Japanese products you need, to make it perfect and authentic. Think maple syrup or fruit compote on pancakes. The better the quality of syrup or compote, the yummier your final product will be. I found a website where you can buy all your okonomiyaki stuff. You can use the mix if you want to, but if you don’t want to pay for it, you can always use all purpose flour. For the finishing touches, you need the following Japanese products:
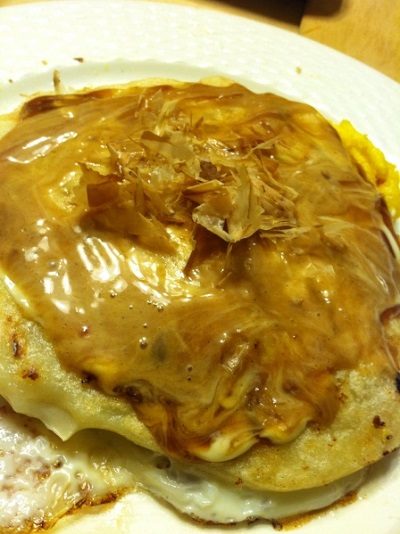
- Aonori (dried seaweed. I use Nagai Aonori. I don’t buy it online so I can’t tell you how this website is, but just in case you can’t find an Asian supermarket and want to know what it looks like, here it is! We usually store it in the freezer so it’ll last longer. I would have taken a photo of it myself, however, mine was empty. Hence the photo above has no aonori on it! Must go replenish.)
- Katsuobushi (bonito flakes. It’s super fun to put on top because it dances! The heat of the pancakes and the lightness of the flakes makes it come to life! We don't use this particular brand, but this will give you an idea of what to purchase.)
- Kewpie Mayonnaise (I grew up with this mayo and it’s the only one I use. My husband says American mayo is yucky and Kewpie Mayo has a good taste to it. You can find it on the okonomiyaki site mentioned before.)
- Okonomiyaki sauce (I use this in other recipes so it’s handy having it in my fridge. My husband likes using it for his experimental cooking.)
Here are notes on the ingredients:
– We are super picky with our ingredients. Great ingredients make delicious food. American cabbage is really hard compared to Japanese cabbage. Of course we recommend using Japanese cabbage. It’s smaller and the leaves are softer. If you’re American cabbage, make sure to take apart several leaves, seven – eight, and microwave it in a bowl with cling wrap to soften it for couple of seconds before use.
– If you want to add more flavors and don’t mind buying more Japanese ingredients, you can add dashi (broth) to the mix. I use Kayanoya and Ajino Hyoshiro. You make the stock according to the directions. If using dashi, I would suggest using 1 cup of dashi and 2 cups of water without dashi.
– If you have a Japanese grocery nearby, look for labels that say “sukiyaki” or “yakiniku” beef. If you don’t have one, make sure you get beef or pork that’s super thin. Another option is bacon, however the flavor of bacon is quite strong so it’s not the same. Make sure you don’t get smoked or flavored bacon.
– In our family, we use eggs under our okonomiyaki and not in it (meaning not in the batter). We usually have one okonomiyaki with egg and others we eat without it (depending upon each person’s preference). Therefore, the number of eggs you use will be up to you.
And equipment! You want to have a tepanyaki for this. I bought mine at a garage sale for $5. (Always keep an eye out for Japanese people’s garage sales. You get the best deals! They usually sell good quality things, they’re usually in good condition, and sold at a reasonable price.)
Now onto the recipe! It makes enough to feed five – six people for dinner. (Seconds and thirds!)
Ingredients:
- 1/3 Japanese cabbage
- 2½ cups of flour
- 3 cups of water
- ½ lb of sliced beef or pork
- eggs (as many as you want on your pancakes)
If you’re using broth, make it before these steps and let it cool down. (Most broth uses hot water to prepare.)
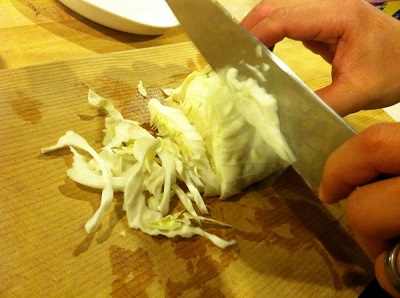
Slice the cabbage.
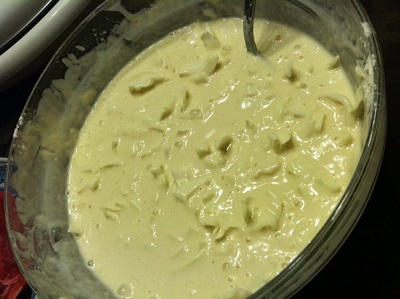
Mix the flour, water and cabbage in a bowl. photo 3Make sure you don’t over mix or it will get too gluten-y. (Yes. I made up a word.) You basically don’t want to develop or bring forth the gluten in the flour. (Gosh, this is where I am reminded that Japanese is my first language. Hope that makes sense. Moving on…)
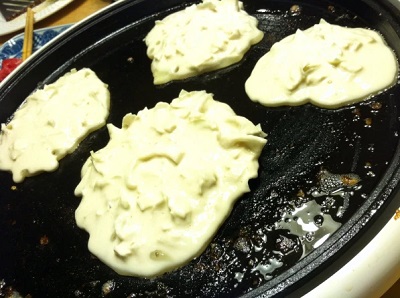
- Warm up the griddle on medium. Pour a thin layer of oil to coat the griddle. Use a ladle and pour out the amount of batter you desire. I usually do one to two scoops in a miso soup ladle (it should be around one of a regular ladle). Cook one side well. It usually takes about 2 – 3 minutes depending upon how thick you made it and it will have a golden color when it’s done. (Don’t flip them yet!) While you wait for the batter to cook on one side, if you want an egg, crack it in a bowl and whisk lightly about once or twice. The egg white should still be separate from the yolk but the yolk should have lost it’s shape.

- Take slices of meat (I usually do two. You can use more. Just make sure they don’t overlap.) and lay them on the uncooked side of the okonomiyaki. Now flip it over! The meat cooks quickly so you’re cooking the other side more for the batter not the meat. About two minutes later, lift up the okonomiyaki with a turner (don’t flip it!) and pour the egg onto the grill. Place the okonomiyaki back on it and wait another minute until the egg is cooked to your liking.

- Serve on a plate and drizzle the Kewpie Mayo and Okonomiyaki Sauce on the okonomiyaki. Take a pinch or two of aonori and katsuobushi and sprinkle over your okonomiyaki. Dig in! (I usually mix the mayo and sauce together after drizzling it on my okonomiyaki.)
(links were updated March 2021)